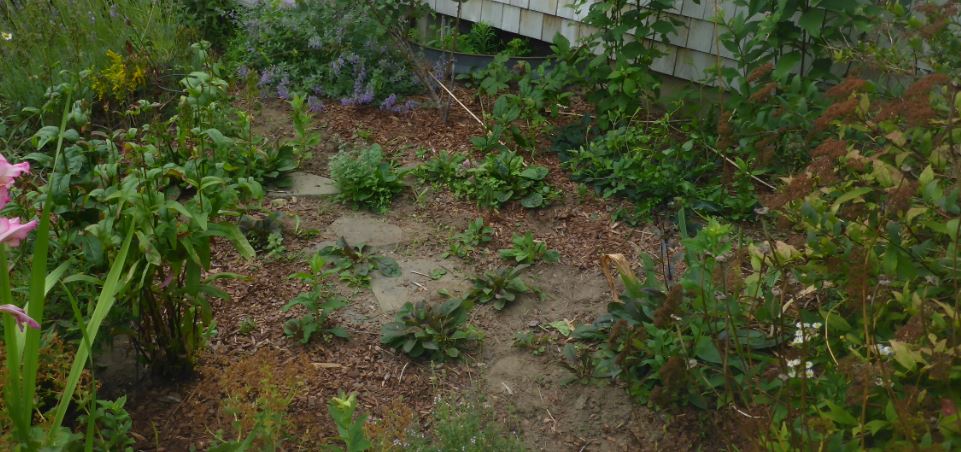
Directly behind our house is a sheltered and sunny space that I call the Glory Garden because it is planted with lots of bright colors, cottage-garden style. It consists of two 10’ x 40’ beds with an 8’ strip of lawn between the beds. One side is planted almost completely with daylilies that produce a real show from July to mid-August.

The other side, nearer the house, has been a mixed border with a variety of shrubs and perennials. Last year I started adding several species of native pollinators. Several did well but others were eaten by the rabbits, leaving the design in shambles.
Revising the design of this bed is the first of my winter projects. This post takes you through the steps to get to a design that I think will work well in this bed. I do find that describing the process and the decisions made along the way helps me be more conscious of design choices and produce a better end design, so I appreciate you bearing with me.
Step 1 – Measure and Map
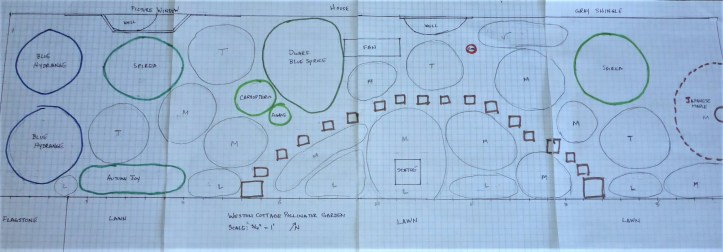
The starting point is a baseline layout of the space, to scale, with the locations and sizes of all the structures and plants that will remain. For this design project, I decided that only the shrubs and a few major plants had to remain in place; the rest I could move around if I wanted, so this freed me from the constraints of working too much around existing perennials.
To create this baseline, two weeks ago I was outside in my warmest coat, wielding two tape measures and a clipboard for marking down measurements.
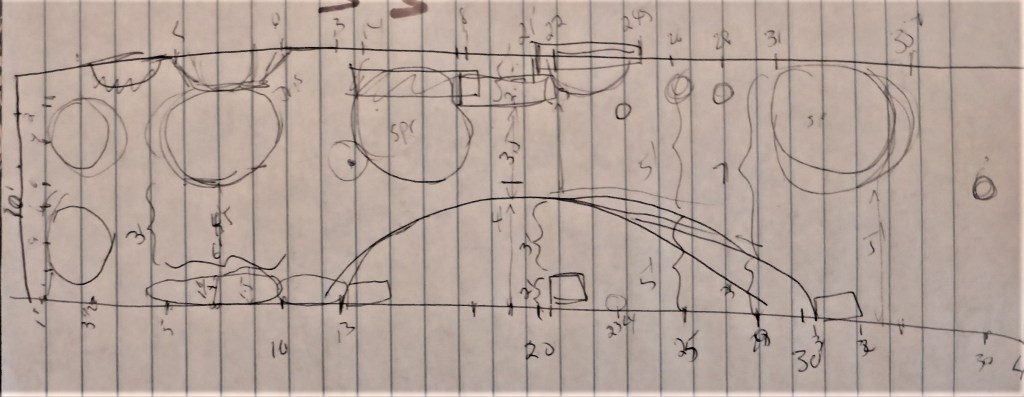
Back inside I taped together enough graph paper to accommodate the 10’ x 40’ dimensions. I decided that ¾ inch would represent 1 foot of the garden (this would allow my diagram to fit on my table). I then used a straightedge and counted a lot of squares to transform my rough measurements into a to-scale baseline diagram.
Step 2 – Assessment and Goals
My primary goal is to increase the number and variety of pollinators while sticking with a cottage garden feel. This means lots of blooms, densely planted, with a casual layout. But the last iteration of the garden looked and felt choppy, so this time I wanted it to be more composed. For me, this means consciously applying key design principles: deciding where to put the focal point, how to make it both balanced and unified, but having interesting color and textures, and how to get the eye moving around the garden to see the overall design as well as stopping to enjoy details.
Also, an ecological garden design should include goals for maximizing habitat value and for minimiazing ongoing management. My goals here are to have at least 70% of the plants have value for pollinators, to have a dense herbaceous planting that (by year 3) minimizes weeds without ongoing mulching, and to have a stable design, that is having species that will not spread around much so the design can be maintained over the years.
Step 3 – Rough Layout
While a cottage garden is often planted in small clumps or drifts, pollinators prefer larger clumps of the same flower so that it’s easier to harvest a full meal without flying around too much. My rough layout started with penciling in larger blocks, circles and ovals in a pleasing pattern, balanced but not symmetrical, to fit in the space. The focal point went in the center, a large block surrounding a statue.
Then each block was labelled with the target height of the plant, from Low (under 12”) to Very Tall (4’). This is a relatively narrow bed, so there are only 3-4 layers of plants deep. I decided that the front of the bed should all be low, the center section low and medium, and the back and both ends should be a mix of medium and tall. That way the taller plants would seem to enclose the center section with the focal point.
A note on technique: I was sketching in pencil directly on the diagram (I have a really good eraser). Another approach is to lay tracing paper on top and sketch on the tracing paper. This is helpful if you are trying many different patterns and layouts while still having a clean base layout to work from. Here, the major elements of the space were already laid out so this time using pencil directly on the base design worked. Or, of course, it can be done on the computer, using visual design tools.
Step 4 – Plant Palette
Now the fun part is starting. In this step I got to create a list of the plants to slot into those blocks on the diagram. This is done as a table, listing the plants as the rows and some of the plant characteristics in the columns – height, bloom time, general shape, growing conditions and tendency to spread are the characteristics that I needed here.

The pollinator plants I chose were taken mostly from the Sunny Pollinator core list, plus a couple of non-native pollinators, and I made sure I had varying heights, shapes and bloom times (I really didn’t care about color at this point). Key to the palette are two new structural plants to help with unity of the design – agastache and amsonia. Agastache is structural because of the tall stems with long-lasting blue flowers, and the amsonia because of the billowy foliage that is a nice contrast to stemmed plants with small leaves. The rest of the list had on it a few ornamental plants that I like that had previously thrived in this garden. Of all the plants, only a couple spread much, so ongoing management of the block design should not be difficult.
Step 5 – Lay Out the Plants on the Base Diagram
Some designers can do the layout just with their own mental image of the plants. I find I need the visual clues of an actual picture in front of me. From an online search I snipped images of each plant into a document, printed them, and cut them out so I could have pictures to design with. This could also be done on the computer, but I find it more satisfying to arrange and rearrange using paper.
The layout is the heart of the design, and it’s both fun and for me, some work. You see all those lovely garden designs in magazines, and they seem effortless. I find, though, there is a lot of iteration that goes into each one. Let me take you through my thinking as I laid out, arranged, and re-arranged the cut-out paper images on the diagram.
I started with three repetitions of my main structural plants, filling in 6 of the 12 slots.
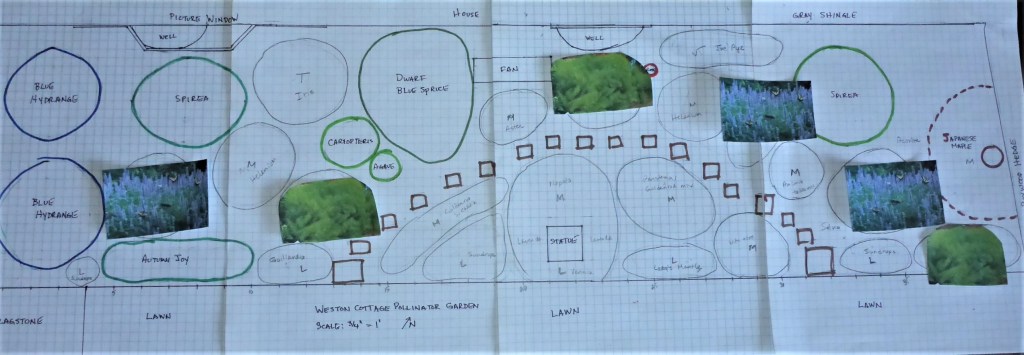
Next, I placed the low plants in front. There were 3 plants – sundrops, gaillardia, and lady’s mantle – and 5 slots. The textures of the gaillardia and lady’s mantle are similar, so each got a large slot, while the sundrops repeated 3 times along the front in somewhat smaller clumps. Each of these plants is yellow and I thought they would draw the eye nicely along the front edge of the bed.
Then I looked at the focal point in the center and decided to make it a grouping of three different blue/purple plants – nepeta, lavender, and veronica. And the very tall Joe Pye found its natural home in the back. Last, I tried to place the remaining plants to give interesting groupings of color, texture, and shape. While just playing with these I tried a few different placements of the major plants as well and broke up the central focal point with some yellow.

Step 6 – Assess and Adjust
The next day I came back with a fresh eye to assess the design from the perspective of unity and balance. It didn’t take long to decide it still looked a bit like a hodgepodge, without sufficient structure, so it needed some re-thinking.
Then I noticed the color patterns – almost everything was blue/purple or yellow/chartreuse. So I took out all the other colors and re-arranged to get a well-balanced arrangement of just these two colors. To relieve the choppiness, I made even larger blocks of blues and yellows – three large blue blocks left, center, and right, with two larger yellow blocks between. The blocks are not even or symmetrical, so the arrangement has some additional interest, but it does give repetition and structure. Within each block I could then pick combinations of plants that had contrast in texture or shape for even more interest.
Without the red and orange, however, it was a pretty boring design and I thought it needed bright pops of color to draw the eye along the garden bed. So those went in next, the helenium and monarda.

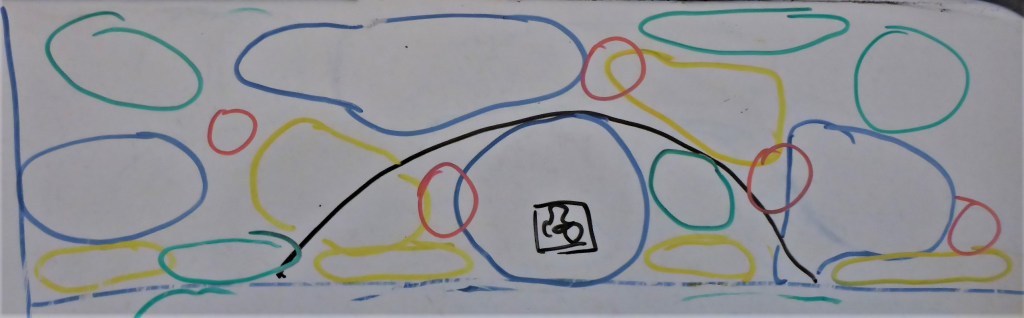
The last assessment was to consider what the design looked like not from the bird’s eye view of the diagram, but from a front view, to get a better idea of shapes and layering. I did this first with a quick sketch using colored markers on a white board, and then on the computer using the same snipped images I had printed out.
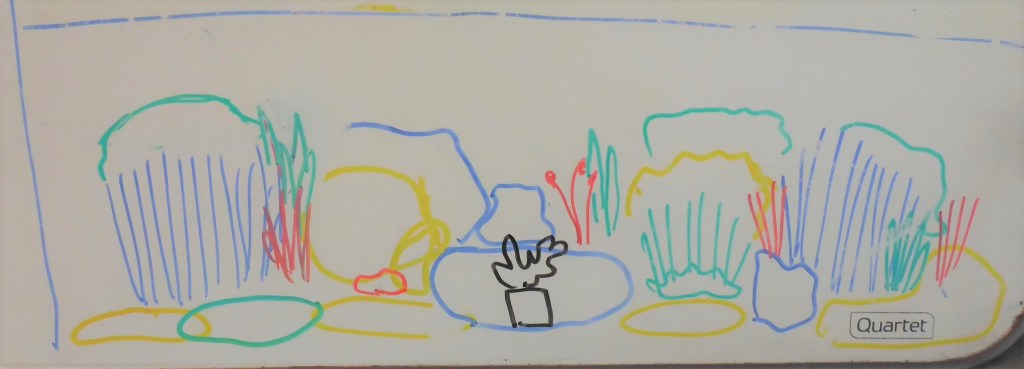
I did some slight rearranging and ended with a design I rather like. Of course, the design will be tweaked once I get plants actually laid out in the garden space, that is inevitable. There are 80 plants total in the space, of which 76% have pollinator value, so I am happy about that. The design is planted densely, but I may still need some ground covers for a “green mulch” – we will see about that after planting.

Step 7 – Source Plants
I won’t bore you with the details of this step, but it involves math – calculating out exactly how many plants of each type are needed for each block, then figuring out how many I already have and how many I need to buy this spring to complete the design. I’ll also be writing detailed notes of which plants to move around and other tasks I’ll need to do when planting time comes around.
It will be fun when spring comes and I get to put this design in the ground!

Love the step+by-step approach to design!
LikeLike
This a very thorough, helpful design system. Thank you!
LikeLike
Thank you very much for this very thorough, detailed explanation of your design process. It’s so important to plan ahead, and I rarely take the time to do it. I am currently taking an online course from Native Plant Trust, Designing with Native Plants, and took the Native Plant Communities course from Staci Jacin last year right before shut down. Just newly getting into native plants and starting to renovate my West Chatham property. Your blog has been so helpful; the rabbits are truly arch enemy #1. Not to mention last year’s drought. Unfortunately I have a lot of turf and invasives — I have to make some hard decisions about that this year – like now. Really enjoying and benefiting from your invaluable information about natives in our neighborhood!
LikeLike
[…] the house that I was planting for maximum bloom in June and July. Two years ago, I re-planned Two years ago I had redesigned this border and last year it did well, but this year was fantastic. It was as […]
LikeLike